Now that you’ve mastered blinking an LED, let’s take things to the next level! In this project, you’ll learn how to control an LED using a pushbutton switch. This is a fun way to teach kids how inputs (the switch) and outputs (the LED) work together in interactive projects.
With this project, you’ll not only learn how to connect and use a switch, but you’ll also get hands-on experience with conditional logic in programming. By reading the state of the switch, you’ll control when the LED turns on and off based on real-time input.
Learning Outcomes
Completing this LED with switch control project, you will:
- Understand how to use digital inputs (the switch) to control digital outputs (the LED).
- Learn the difference between input and output pins on an Arduino.
- Get familiar with conditional logic using
if/elsestatements in programming. - Discover how to read the state of a switch and use that information to control other electronic components.
Materials Needed
To complete this project, you’ll need the following materials:
- 1 x Arduino Uno board
- 1 x LED (any color)
- 1 x 220 ohm resistor
- 1 x 10K ohm resistor
- 1 x Pushbutton switch
- 4 x Jumper wires
- 1 x Breadboard
Step-by-Step Instructions: Control an LED with a Switch
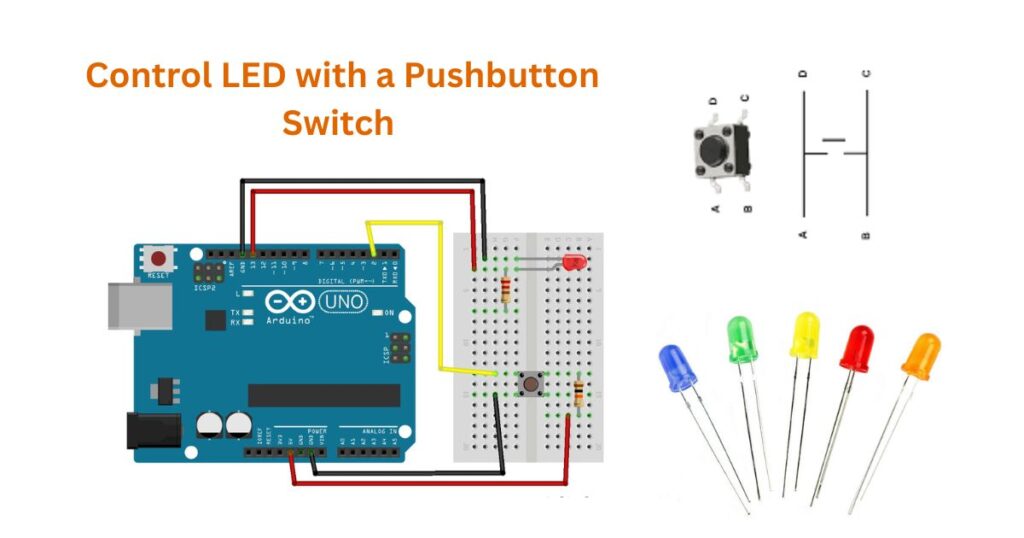
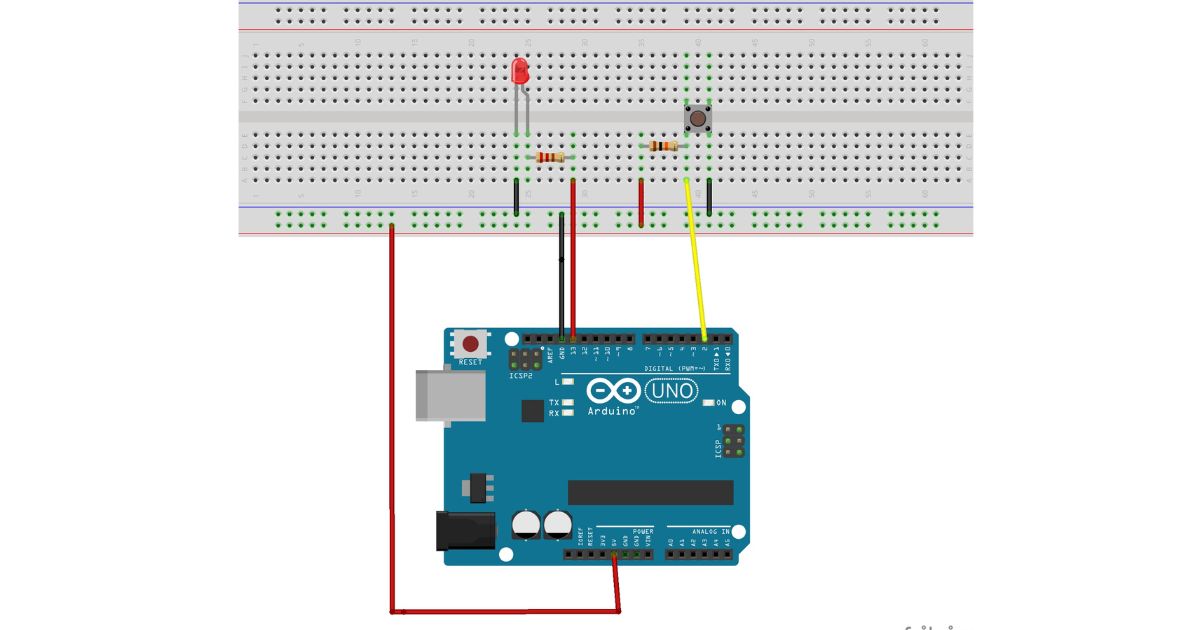
Step 1: Connect the LED
- Just like in the previous project, insert the LED into the breadboard.
- Connect the LED’s positive leg (longer) to digital pin 13 on the Arduino.
- Connect the negative leg (shorter) to the ground (GND) pin via a 220 ohm resistor to limit the current.
Step 2: Connect the Pushbutton Switch
- Insert the pushbutton switch into the breadboard.
- Use a jumper wire to connect one leg of the switch to digital pin 2 on the Arduino.
- Connect a 10k ohm resistor between the same leg of the switch and 5V (VCC) to ensure a stable input signal.
- Connect the other leg of the switch to the ground (GND) on the Arduino.
Step 3: Write the Code
- Open the Arduino IDE and create a new sketch. Enter the following code:
// Set the LED and switch pins
int ledPin = 13;
int switchPin = 2;

void setup() {
  // Set the LED pin as an output and the switch pin as an input
  pinMode(ledPin, OUTPUT);
  pinMode(switchPin, INPUT);
}

void loop() {
  // Read the state of the switch
  int switchState = digitalRead(switchPin);

  // If the switch is pressed, turn the LED on
  if (switchState == HIGH) {
    digitalWrite(ledPin, HIGH);
  }
  // If the switch is not pressed, turn the LED off
  else {
    digitalWrite(ledPin, LOW);
  }
}
Step 4: Upload the Code
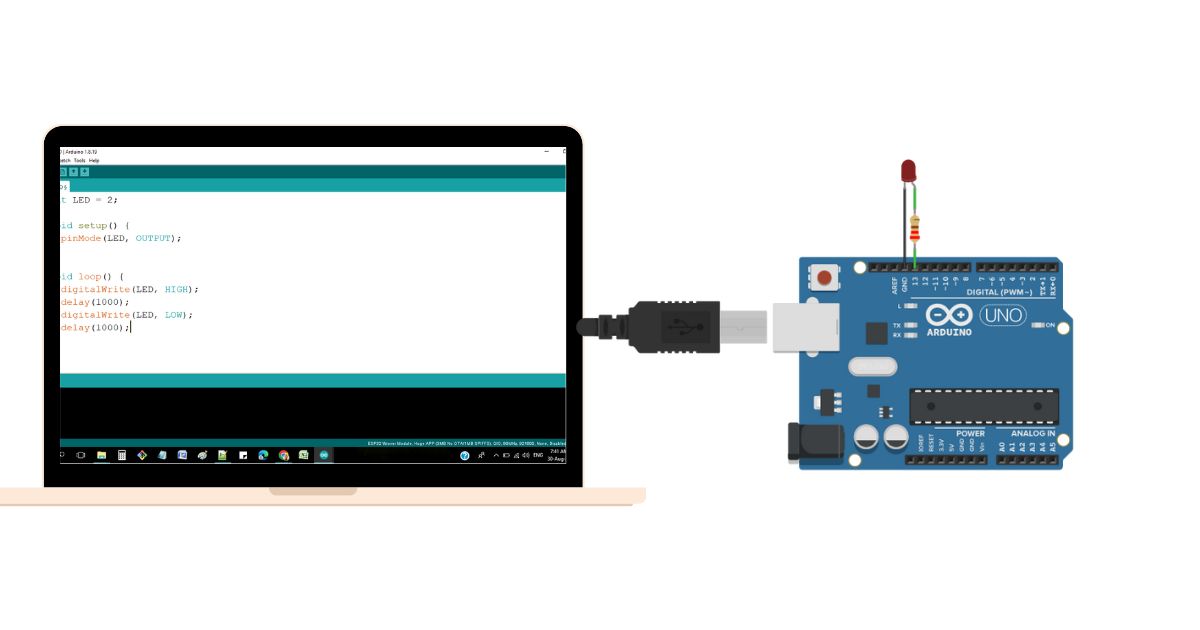
- Click the Upload button in the Arduino IDE to send your code to the Arduino board.
Step 5: Test it Out!
- Press the pushbutton switch and watch the LED turn on and off depending on the switch’s state. Congratulations! You’ve just built an interactive project.
Project Expansion Ideas
Once you’ve completed this project, you can take it further by:
- Adding multiple LEDs: Try controlling more than one LED with a single button or multiple buttons.
- Using different inputs: Replace the pushbutton with other input devices, like a sensor or potentiometer, to create more complex interactions.
- Introducing a debounce feature: Learn about switch bouncing and how to code a debounce solution to make your switch more reliable.
LED with Switch Control Circuit Diagram
Common Issues and Troubleshooting
- Why isn’t my LED turning on?
- Check your connections to make sure everything is wired correctly. Ensure that the LED’s positive leg is connected to pin 13 and the negative leg to ground through the resistor.
- Why does the LED flicker when I press the switch?
- This is likely due to switch bouncing. You can solve this by adding a debounce function to your code.

