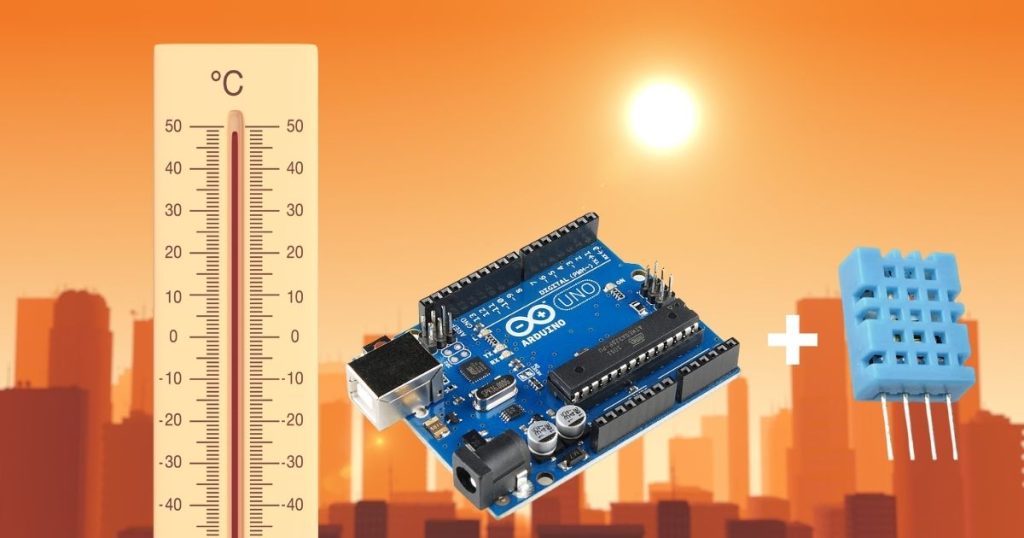
What powers the precise comfort of a smart thermostat or the real-time updates of a community weather station? How can you monitor your home’s air quality, protect a small indoor garden, or contribute to a global climate research network with one compact device? The DHT11 temperature and humidity sensor offers a practical, beginner-friendly solution to these questions. This reliable sensor connects directly to Arduino, enabling you to measure temperature and humidity for projects like weather stations, home automation systems, indoor plant monitors, or IoT data loggers. Whether you’re a student experimenting in a school lab, a hobbyist building in a home workshop, or a maker addressing environmental challenges in your community, the DHT11 provides accurate data to drive meaningful outcomes. From maintaining healthy indoor spaces in urban apartments to optimising conditions for balcony gardens in suburban homes, this sensor supports universal applications across diverse environments. In this detailed guide, you’ll learn to connect the DHT11 to Arduino, write straightforward code, visualise data, and develop projects like a home climate dashboard with Wi-Fi integration. With clear instructions, practical examples, and step-by-step support, this tutorial equips you to turn environmental data into actionable solutions, regardless of your location. Start building your Arduino project today!
Understanding the DHT11 Sensor
The DHT11 is a digital sensor that measures:
- Temperature: 0°C to 50°C (±2°C accuracy).
- Humidity: 20% to 90% relative humidity (±5% accuracy).
Why Choose the DHT11?
- Straightforward Setup: Connects with one data wire for simplicity.
- Low Power: Operates on 3.3V or 5V, suitable for portable projects.
- Adaptable: Supports DIY projects like weather monitors or home automation.
Pin Configuration
The DHT11 has four pins (or three on modules):
| Pin | Function | Arduino Connection |
|---|---|---|
| VCC | Power (3.3V or 5V) | 5V |
| Data | Sensor Output | Digital Pin 2 |
| NC | Not Connected | – |
| GND | Ground | GND |
Note: For a bare DHT11 sensor, add a 10kΩ resistor between VCC and Data pins. DHT11 modules include this resistor.
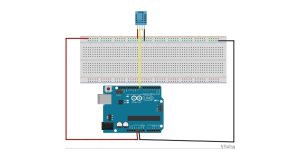
What You’ll Need
- Arduino Board (e.g., Uno, Nano, or Mega).
- DHT11 Sensor (sensor or module).
- 10kΩ Resistor (if using a bare sensor).
- Jumper Wires.
- Breadboard.
- Computer with Arduino IDE installed (free at arduino.cc).
Step 1: Connect the DHT11 to Arduino
Wire the DHT11 to your Arduino for accurate data.
Wiring Instructions
- VCC to 5V: Connect DHT11 VCC to Arduino’s 5V pin.
- GND to GND: Connect DHT11 GND to Arduino’s GND pin.
- Data to Pin 2: Connect DHT11 Data to Arduino’s Digital Pin 2.
- Add Resistor (if needed): For a bare DHT11, place a 10kΩ resistor between VCC and Data pins.
Wiring Diagram
   DHT11       Arduino
   VCC  ---->  5V
   GND  ---->  GND
   Data ---->  Pin 2
   (10kΩ resistor between VCC and Data, if bare sensor)
Tip: Use a breadboard for organised connections and verify wires to avoid errors.
Step 2: Install the DHT Library
The Adafruit DHT library simplifies reading data from the DHT11.
- Open Arduino IDE.
- Go to Sketch > Include Library > Manage Libraries.
- Search for DHT sensor library by Adafruit.
- Click Install (also install Adafruit Unified Sensor if prompted).
Step 3: Write and Upload Arduino Code
This code reads temperature and humidity and displays them in the Serial Monitor.
Arduino Code
#include <DHT.h>

// Define sensor pin and type
#define DHTPIN 2        // Data pin connected to Pin 2
#define DHTTYPE DHT11   // Using DHT11 sensor

// Create DHT object
DHT dht(DHTPIN, DHTTYPE);

void setup() {
  Serial.begin(9600);  // Start Serial Monitor
  dht.begin();         // Start DHT11
  delay(2000);         // Wait for sensor to settle
}

void loop() {
  // Read humidity and temperature
  float humidity = dht.readHumidity();
  float temperature = dht.readTemperature();

  // Check for reading errors
  if (isnan(humidity) || isnan(temperature)) {
    Serial.println("Failed to read from DHT11 sensor!");
    return;
  }

  // Print readings
  Serial.print("Humidity: ");
  Serial.print(humidity);
  Serial.print("%  |  Temperature: ");
  Serial.print(temperature);
  Serial.println("°C");

  delay(2000);  // Update every 2 seconds
}
How the Code Works
- Include Library:
#include <DHT.h>loads the DHT library. - Define Pin and Type:
DHTPIN 2sets the data pin;DHTTYPE DHT11specifies the sensor. - Start Sensor:
dht.begin()begins communication;Serial.begin(9600)opens the Serial Monitor. - Read Data:
dht.readHumidity()anddht.readTemperature()capture values. - Error Check:
isnan()detects invalid readings (e.g., loose connections). - Output: Prints humidity (%) and temperature (°C) every 2 seconds.
Step 4: Test the Setup
- Connect your Arduino to your computer via USB.
- Upload the code (click Upload in Arduino IDE).
- Open the Serial Monitor (Tools > Serial Monitor, 9600 baud).
- Expect readings like:
Humidity: 45.60%  |  Temperature: 25.80°C
Humidity: 46.20%  |  Temperature: 25.90°C
Tip: If no data appears, check wiring, confirm Pin 2, and ensure the DHT library is installed.
Step 5: Visualise Data
Display data in effective ways beyond the Serial Monitor.
Option 1: Serial Plotter
- Go to Tools > Serial Plotter in Arduino IDE (9600 baud).
- Modify the code:
Serial.print(humidity); Serial.print(","); Serial.println(temperature); - View a live graph of humidity and temperature trends.
Option 2: 16×2 LCD Display
Use a 16×2 LCD with I2C for a standalone display.
Wiring
- LCD VCC to Arduino 5V.
- LCD GND to Arduino GND.
- LCD SDA to Arduino A4.
- LCD SCL to Arduino A5.
Modified Code
#include <DHT.h>
#include <LiquidCrystal_I2C.h>

// DHT setup
#define DHTPIN 2
#define DHTTYPE DHT11
DHT dht(DHTPIN, DHTTYPE);

// LCD setup (address 0x27 for most modules)
LiquidCrystal_I2C lcd(0x27, 16, 2);

void setup() {
  Serial.begin(9600);
  dht.begin();
  lcd.begin();
  lcd.backlight();
  delay(2000);
}

void loop() {
  float humidity = dht.readHumidity();
  float temperature = dht.readTemperature();

  if (isnan(humidity) || isnan(temperature)) {
    Serial.println("Failed to read from DHT11 sensor!");
    return;
  }

  // Display on LCD
  lcd.clear();
  lcd.setCursor(0, 0);
  lcd.print("Hum: ");
  lcd.print(humidity);
  lcd.print("%");
  lcd.setCursor(0, 1);
  lcd.print("Temp: ");
  lcd.print(temperature);
  lcd.print("C");

  // Print to Serial
  Serial.print("Humidity: ");
  Serial.print(humidity);
  Serial.print("%  |  Temperature: ");
  Serial.print(temperature);
  Serial.println("°C");

  delay(2000);
}
Library
Install LiquidCrystal_I2C via Arduino IDE’s Library Manager.
Result: Readings display on the LCD, ideal for portable projects.
Step 6: Integrate with Wi-Fi for Cloud Logging
Connect the DHT11 to ThingSpeak using an ESP8266 Wi-Fi module for cloud-based data logging.
Wiring
- ESP8266 VCC to Arduino 3.3V.
- ESP8266 GND to Arduino GND.
- ESP8266 TX to Arduino Pin 10.
- ESP8266 RX to Arduino Pin 11.
- DHT11: VCC to 5v, GND to GND, Data to Pin 2.
Code
#include <DHT.h>
#include <SoftwareSerial.h>

#define DHTPIN 2
#define DHTTYPE DHT11
DHT dht(DHTPIN, DHTTYPE);
SoftwareSerial esp(10, 11);  // RX, TX

const char* ssid = "your_wifi_ssid";
const char* password = "your_wifi_password";
const char* server = "api.thingspeak.com";
const String apiKey = "your_thingspeak_api_key";

void setup() {
  Serial.begin(9600);
  esp.begin(115200);
  dht.begin();
  delay(2000);
  connectWiFi();
}

void loop() {
  float humidity = dht.readHumidity();
  float temperature = dht.readTemperature();

  if (isnan(humidity) || isnan(temperature)) {
    Serial.println("Failed to read from DHT11!");
    return;
  }

  sendToThingSpeak(humidity, temperature);
  delay(20000);  // ThingSpeak requires 15s+ between updates
}

void connectWiFi() {
  esp.println("AT+RST");
  delay(2000);
  esp.println("AT+CWMODE=1");
  delay(1000);
  esp.print("AT+CWJAP=\"");
  esp.print(ssid);
  esp.print("\",\"");
  esp.print(password);
  esp.println("\"");
  delay(5000);
}

void sendToThingSpeak(float h, float t) {
  esp.println("AT+CIPSTART=\"TCP\",\"api.thingspeak.com\",80");
  delay(2000);
  String data = "GET /update?api_key=" + apiKey + "&field1=" + String(h) + "&field2=" + String(t);
  esp.print("AT+CIPSEND=");
  esp.println(data.length());
  delay(1000);
  esp.println(data);
  delay(1000);
  esp.println("AT+CIPCLOSE");
}
Library
Install SoftwareSerial (built-in with Arduino IDE).
Setup: Create a ThingSpeak account and channel at thingspeak.com.
Result: View humidity and temperature on ThingSpeak’s web dashboard, accessible globally.
Step 7: Add Humidity-Based LED Indicator
Use an LED to signal high humidity (e.g., above 70%).
Wiring
- LED: Anode to Pin 9 via a 220Ω resistor, Cathode to GND.
- DHT11: VCC to 5V, GND to GND, Data to Pin 2.
Modified Code
#include <DHT.h>

#define DHTPIN 2
#define DHTTYPE DHT11
#define LED_PIN 9

DHT dht(DHTPIN, DHTTYPE);

void setup() {
  Serial.begin(9600);
  dht.begin();
  pinMode(LED_PIN, OUTPUT);
  delay(2000);
}

void loop() {
  float humidity = dht.readHumidity();
  float temperature = dht.readTemperature();

  if (isnan(humidity) || isnan(temperature)) {
    Serial.println("Failed to read from DHT11!");
    return;
  }

  // Control LED
  if (humidity > 70) {
    digitalWrite(LED_PIN, HIGH);  // LED on
  } else {
    digitalWrite(LED_PIN, LOW);   // LED off
  }

  // Print to Serial
  Serial.print("Humidity: ");
  Serial.print(humidity);
  Serial.print("%  |  Temperature: ");
  Serial.print(temperature);
  Serial.println("°C");

  delay(2000);
}
Result: LED lights up when humidity exceeds 70%, providing a visual alert for home or office settings.
Step 8: Sample Project: Home Climate Dashboard
Build a home climate dashboard with an LCD and Wi-Fi for real-time monitoring.
Components
- Arduino Uno.
- DHT11 sensor.
- 16×2 LCD with I2C.
- ESP8266 Wi-Fi module.
- Jumper wires, breadboard.
Wiring
- DHT11: VCC to 5v, GND to GND, Data to Pin 2.
- LCD: VCC to 5v, GND to GND, SDA to A4, SCL to A5.
- ESP8266: VCC to 3.3v, GND to GND, TX to Pin 10, RX to Pin 11.
Code
#include <DHT.h>
#include <LiquidCrystal_I2C.h>
#include <SoftwareSerial.h>

#define DHTPIN 2
#define DHTTYPE DHT11
DHT dht(DHTPIN, DHTTYPE);
LiquidCrystal_I2C lcd(0x27, 16, 2);
SoftwareSerial esp(10, 11);  // RX, TX

const char* ssid = "your_wifi_ssid";
const char* password = "your_wifi_password";
const char* server = "api.thingspeak.com";
const String apiKey = "your_thingspeak_api_key";

void setup() {
  Serial.begin(9600);
  esp.begin(115200);
  dht.begin();
  lcd.begin();
  lcd.backlight();
  delay(2000);
  connectWiFi();
}

void loop() {
  float humidity = dht.readHumidity();
  float temperature = dht.readTemperature();

  if (isnan(humidity) || isnan(temperature)) {
    Serial.println("Failed to read from DHT11!");
    lcd.clear();
    lcd.print("Sensor Error");
    return;
  }

  // Display on LCD
  lcd.clear();
  lcd.setCursor(0, 0);
  lcd.print("Hum: ");
  lcd.print(humidity);
  lcd.print("%");
  lcd.setCursor(0, 1);
  lcd.print("Temp: ");
  lcd.print(temperature);
  lcd.print("C");

  // Print to Serial
  Serial.print("Humidity: ");
  Serial.print(humidity);
  Serial.print("%  |  Temperature: ");
  Serial.print(temperature);
  Serial.println("°C");

  // Send to ThingSpeak
  sendToThingSpeak(humidity, temperature);
  delay(20000);  // ThingSpeak requires 15s+ between updates
}

void connectWiFi() {
  esp.println("AT+RST");
  delay(2000);
  esp.println("AT+CWMODE=1");
  delay(1000);
  esp.print("AT+CWJAP=\"");
  esp.print(ssid);
  esp.print("\",\"");
  esp.print(password);
  esp.println("\"");
  delay(5000);
}

void sendToThingSpeak(float h, float t) {
  esp.println("AT+CIPSTART=\"TCP\",\"api.thingspeak.com\",80");
  delay(2000);
  String data = "GET /update?api_key=" + apiKey + "&field1=" + String(h) + "&field2=" + String(t);
  esp.print("AT+CIPSEND=");
  esp.println(data.length());
  delay(1000);
  esp.println(data);
  delay(1000);
  esp.println("AT+CIPCLOSE");
}
Steps
- Wire components as listed.
- Upload the code.
- View readings on the LCD and Serial Monitor.
- Monitor data on ThingSpeak’s web dashboard.
Applications: Track home climate conditions remotely, ideal for apartments or offices worldwide.
Step 9: Troubleshoot Common Issues
Address problems for consistent performance:
- “Failed to read from DHT11!”:
- Verify wiring (VCC to 5v, GND to GND, Data to Pin 2).
- Check
#define DHTTYPE DHT11(not DHT22). - Add a 10kΩ resistor for bare sensors.
- Ensure secure breadboard connections.
- Inaccurate Readings:
- Place the sensor away from heat (e.g., Arduino, sunlight).
- Use a 2-second delay (
delay(2000)). - Ensure airflow around the sensor.
- No Serial Output:
- Confirm 9600 baud in Serial Monitor.
- Check the USB cable and Arduino port.
- LED Not Lighting:
- Verify the resistor (220Ω) and LED polarity.
- Test with
digitalWrite(9, HIGH)separately.
- ESP8266 Not Connecting:
- Check Wi-Fi credentials and baud rate (115200).
- Run AT command test sketch for ESP8266.
- LCD Not Displaying:
- Confirm I2C address (use scanner sketch).
- Verify SDA/SCL wiring (A4/A5).
DHT11 vs. DHT22
| Feature | DHT11 | DHT22 |
|---|---|---|
| Temperature Range | 0°C to 50°C (±2°C) | -40°C to 80°C (±0.5°C) |
| Humidity Range | 20% to 90% (±5%) | 0% to 100% (±2%) |
| Accuracy | Suitable for basic projects | Higher for precise needs |
| Use Case | Weather stations, homes | Industrial, extreme climates |
Recommendation: Use DHT11 for simple projects in typical conditions. Choose DHT22 for high-precision or extreme environments.
Real-World Applications
- Weather Stations: Monitor urban or rural climates.
- Smart Homes: Adjust ventilation or AC based on data.
- Indoor Gardening: Optimise conditions for plants.
- Office Monitoring: Ensure comfortable work environments.
- IoT Systems: Share data via cloud platforms.
Conclusion
You’ve learned to use the DHT11 temperature and humidity sensor with Arduino to monitor environments and address real-world needs. From wiring to coding to building a home climate dashboard, you’re equipped to develop weather stations, smart systems, or IoT projects. Experiment with Wi-Fi, LEDs, or LCDs to expand your skills. The DHT11 enables practical solutions for your Arduino projects worldwide!
Explore more projects at Nicrobit Learning Lab and continue building!
Resources
FAQs
Q: Can I use DHT11 with Arduino Nano or Mega?
A: Yes, connect Data to any digital pin and update #define DHTPIN.
Q: Why is a 10kΩ resistor needed?
A: It stabilises the Data signal for bare DHT11 sensors. Modules include it.
Q: Why are my readings inaccurate?
A: Avoid heat sources, ensure 2-second delays, and check wiring.
Q: Does DHT11 require the internet?
A: No, it’s a local sensor. The Internet is needed only for IoT features.
Q: How do I add an LED alert?
A: Connect an LED to Pin 9 and use digitalWrite() (see Step 7).
Q: DHT11 or DHT22 for typical climates?
A: DHT11 for basic projects; DHT22 for precision.
Q: Why is my Wi-Fi not connecting?
A: Check ESP8266 credentials and baud rate (115200).
Q: Can I monitor data remotely?
A: Yes, use ThingSpeak with ESP8266 (see Step 6).

